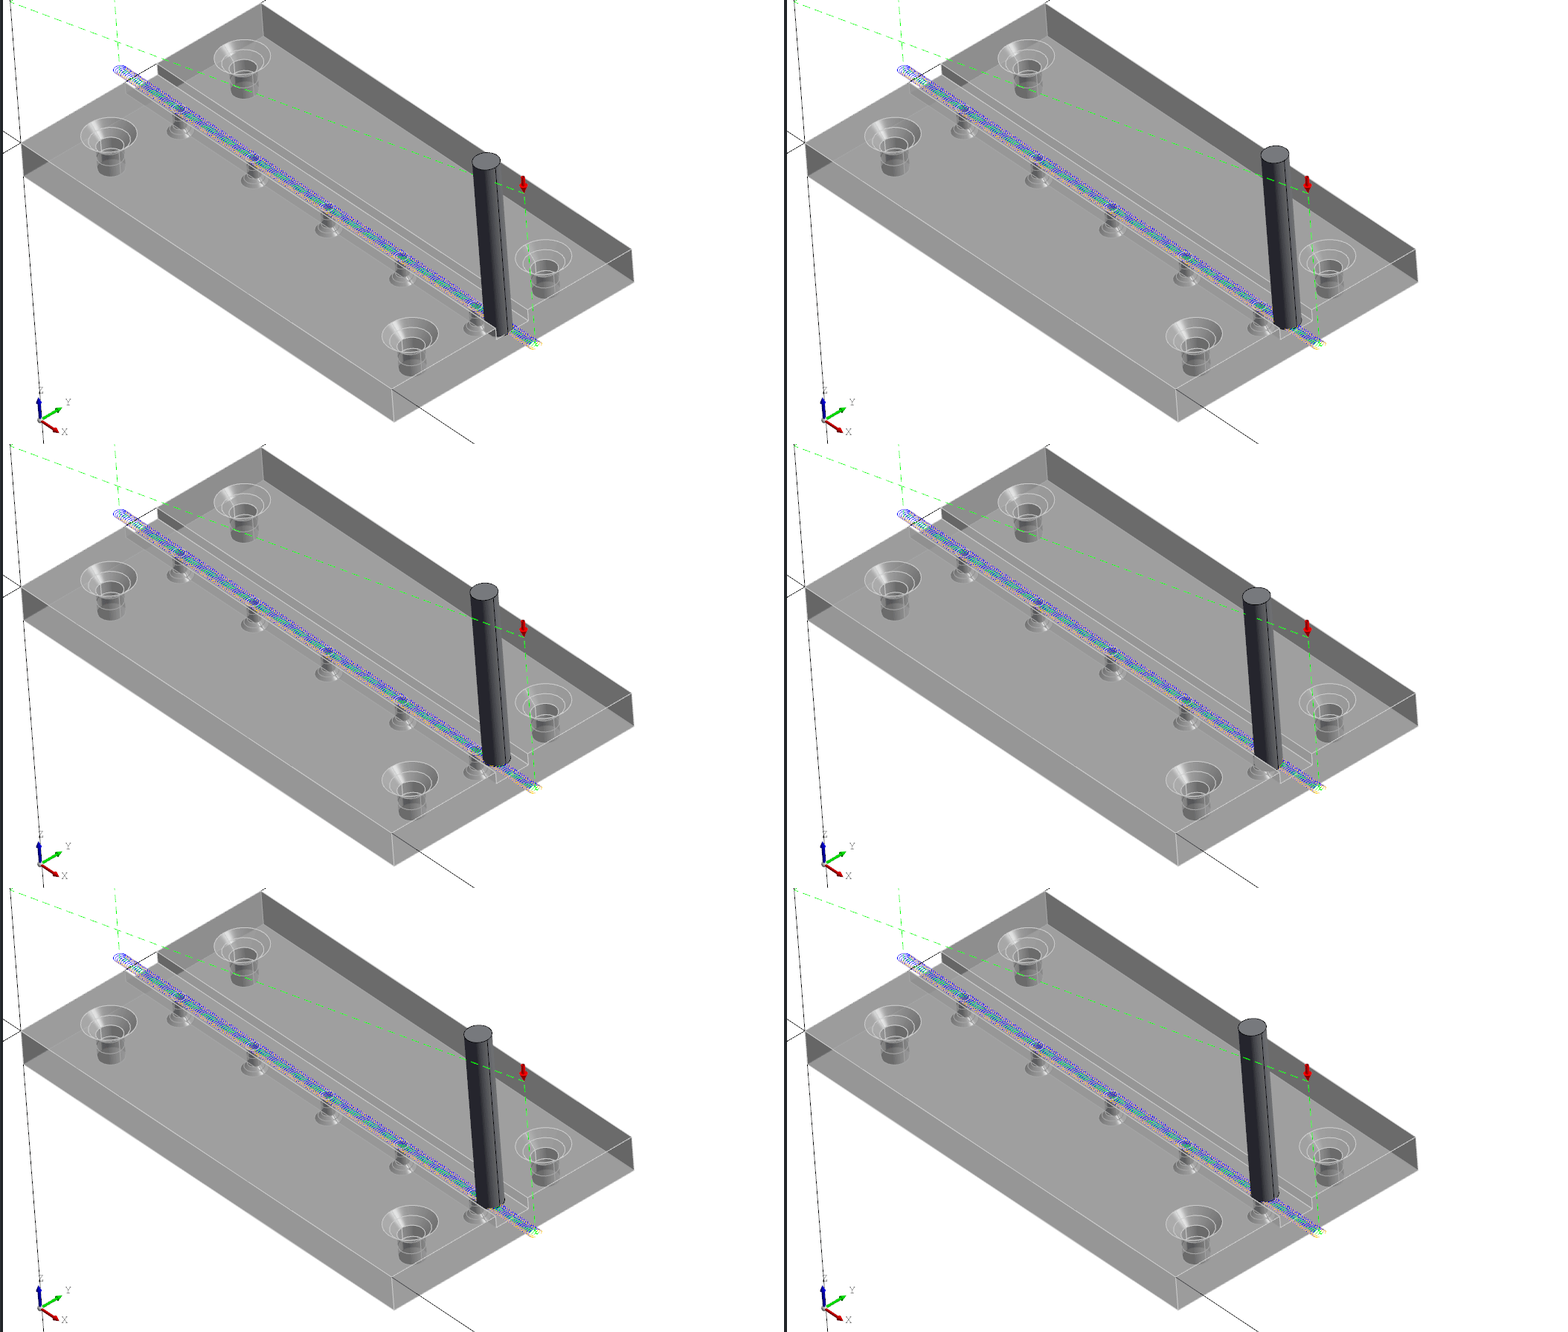
DeclaraCAD is slowly gaining support for different milling operations including animations of the toolpath.
Note: This is currently under development and may change in future versions.
Job
The milling operations are combined into a Job node. The Job has a filename where it writes the generated gcode from each operation. The output file can be loaded on your CNC controller (LinuxCNC, Mach3, etc..).
Each operation added to the job can be disabled by setting disabled = True which will omit generation of that operation to do partial runs of a job. Each operation also has a feedrate, spindle_speed, and coolant attributes that can be set. Different operations may also provide attributes more control for different parts of the operation.
The JobSimulation node can be used to preview all operations. DeclaraCAD will animate each of the job's operations.
Feed and speed
DeclaraCAD will calculate the spindle_speed and feedrate based on the University of Florida's guidelines. Provide the surface_speed for the material you're cutting and it will calculate the speed / and feed adjusted to the tool provided and for some operations the toolpath parameters.
The defaults can provide a good starting points but will likely need tweaking. You can manually set the values or calculate them using your own python/enaml expressions.
Machine limits
The Job also has a max_spindle_speed attribute to set the maximum rpm of the machine. If the calculated speed is over this limit it will be clamped to the maximum value and the expression engine will automatically adjust the feed rate. For example if your machine has a limit of 3500 rpm but a small diameter mill toolpath calculates a 4700 rpm and 56 in/min spindle speed and feed, it will automatically clamp the spindle speed to 3500 and adjust the feed rate to 42 in/min.
Note: In practice these recommendations make nice looking chips but be can easily stall a lower powered "home shop" mill so each operation includes a
slowdown_factorthat defaults to0.6.
Drilling cycle
The DrillingOperation operation can be used to generate G73, G81, G82, and G83. To use it pass in the tool (typically a TwistDrill) and specify the list of holes to drill.
Holes may be either a point, a circular edge selected from a part, or a cylindrical surface selected from the part. DeclaraCAD will obtain the X and Y positions from the holes specified and generate gcode and a path to visualize the operations.
The drilling cycle can be customized with the retract, depth, dwell, feedrate, peck depth, and full_retract options.
Note: By default
full_retractwill automatically be enabled and the speed/feed is divided by 3 for holes deeper than3 x tool diameter. Additionally, the defaultpeckvalue will be reduced to 1/2 the tool diameter holes deeper than3 x tool diameter. It may be necessary to switch pulleys / reduced gear and increase thespindle_speedaccordingly for very deep holes.
from declaracad.cnc.operations import Job, DrillingCycle, TwistDrill, JobSimulation

enamldef Assembly(Part):
    Axis:
        pass
    RouterAdapterPlate: plate:
        position = (0, 0, -1/4*inch)
    Job: milling_job:
        inches = True
        filename = f"{__name__}.tap"
        DrillingOperation:
            tool = TwistDrill(diameter=7, position=start_point)
            retract = 0.1*inch
            depth = -0.3*inch
            peck = 1
            full_retract = True
            start_point = (0, 0, 1*inch)
            holes = [
                f for i, f in enumerate(plate.topology.faces)
                if i in (44, 46, 50, 52)
            ]
        DrillingOperation:
            tool = TwistDrill(diameter=4.5, position=start_point)
            retract = 0.1*inch
            depth = -0.3*inch
            peck = 1
            start_point = (0, 0, 1*inch)
            color = 'blue'
            holes = [
                f for i, f in enumerate(plate.topology.faces)
                if i in (45, 48, 49, 51)
            ]
    JobSimulation:
        job = milling_job
        rate = 0.9

Thread milling
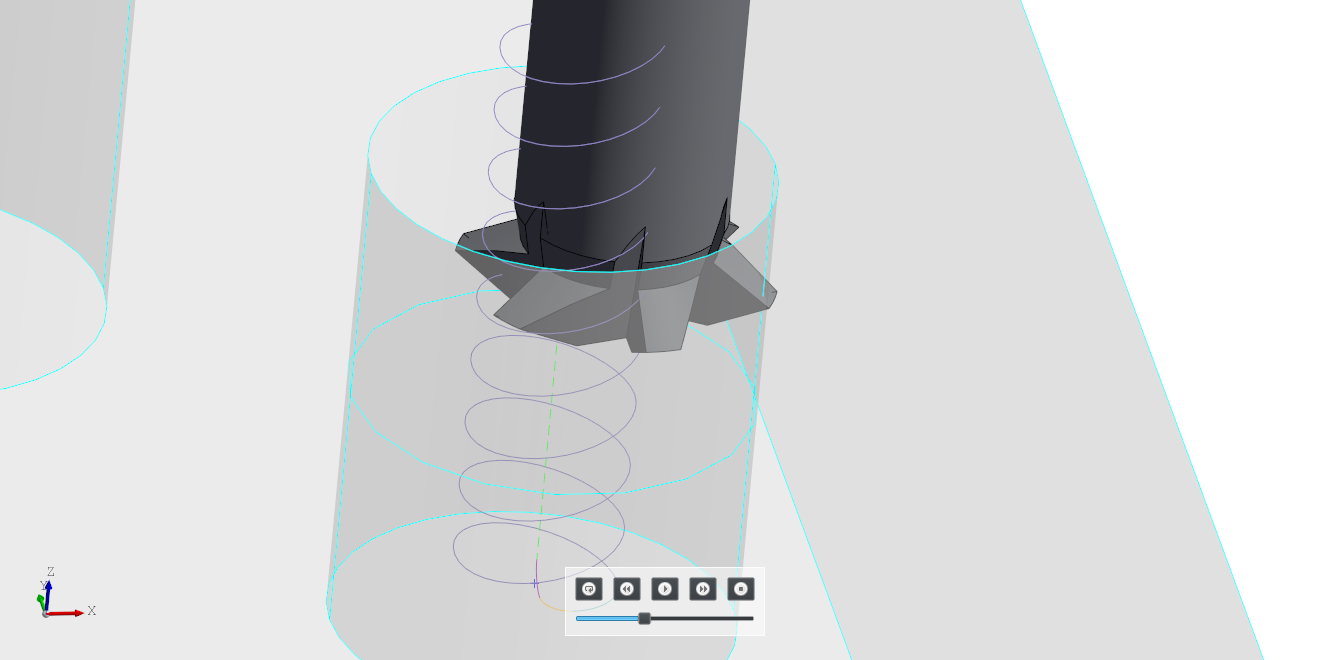
The ThreadingOperation is used to cut threads into a pre-drilled hole from a cylindrical face. Provide the tool (a ThreadMill) with the proper diameter, angle, and pitch and a list of holes to thread mill. Set left_hand=True to make a left hand thread. DeclaraCAD will color code right hand threads as blue and left hand threads as red.
By default the operation expects a pre-drilled hole and will do a helix starting at the bottom and going up. If you have a self drilling mill use bottom_up=False to start at the top and go down.
The radial_clearance and bottom_clearance parameters can be set to customize the toolpath.
Note: Tapered threads are not yet supported.
Circular pocket
The CircularPocketOperation operation can be used to generate a path to mill a circular pocket from a cylindrical face. To use it pass in the tool (typically an EndMill) and specify the tool diameter and list of pockets to mill out. The operation does a helix down then a spiral out to the edge (less the tool offset). The step_down, step_over, feedrate, helix_radius, helix_pitch, top_clearance, bottom_clearance, and radial_clearance can be specified to customize the toolpath.
The helix_pitch and step_over default to 6% of the tool diameter. These can be adjusted to change the chip load. For deep pockets it is recommended to lower the step_over accordingly.
The top_clearance is added to the top height of the pocket. This will cause the toolpath helix to start above the top surface. The bottom_clearance is added to the bottom of the pocket, a positive value leaves extra stock on the bottom of the pocket, while a negative number will take more stock away (or in the case of a hole can be used to increase the "cut through" amount). The radial_clearance defaults to 0 and is added to the cut diameter. A positive value will cut more away while a negative value will leave extra stock (eg for a second finishing operation).
Note: Each element in the
pocketslist can be a tuple that contains either a depth or second edge to define the bottom of the cut (eg to correct for fillets and chamfers at the bottom edge).
DeclaraCAD will show a simulation of the operation and generate gcode to perform the operation on a milling machine.
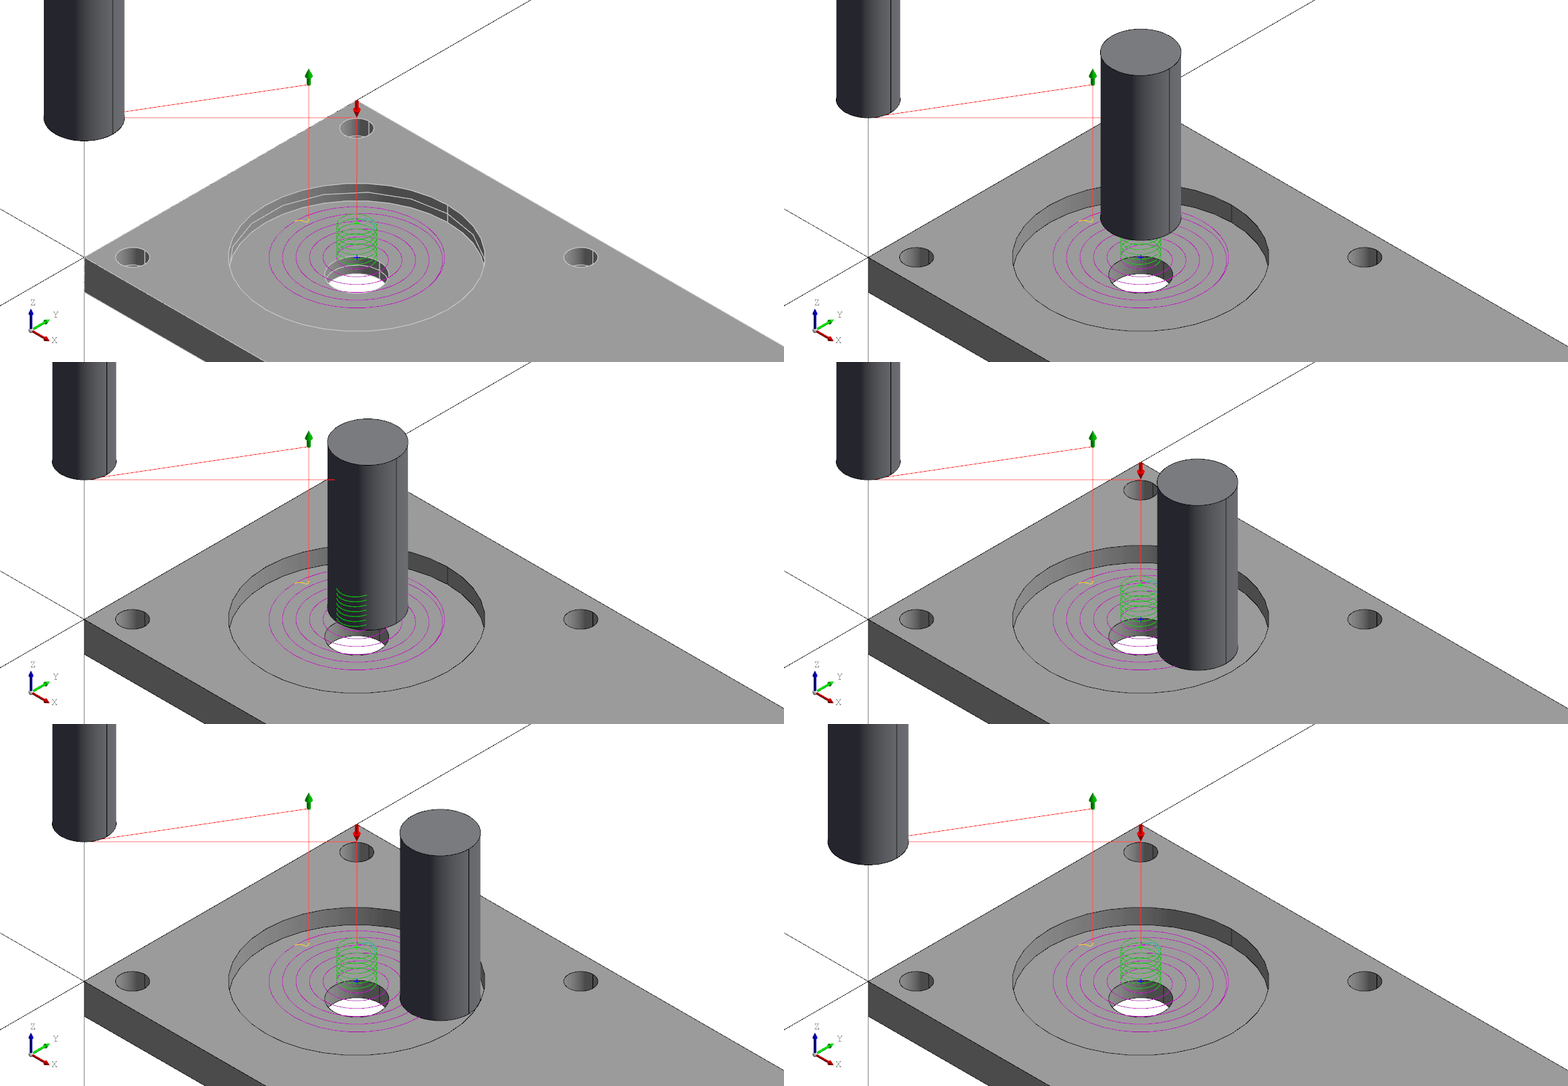
Note: The above image shows conventional milling. There is an option to use climb milling (
climb=True) which is enabled by default.
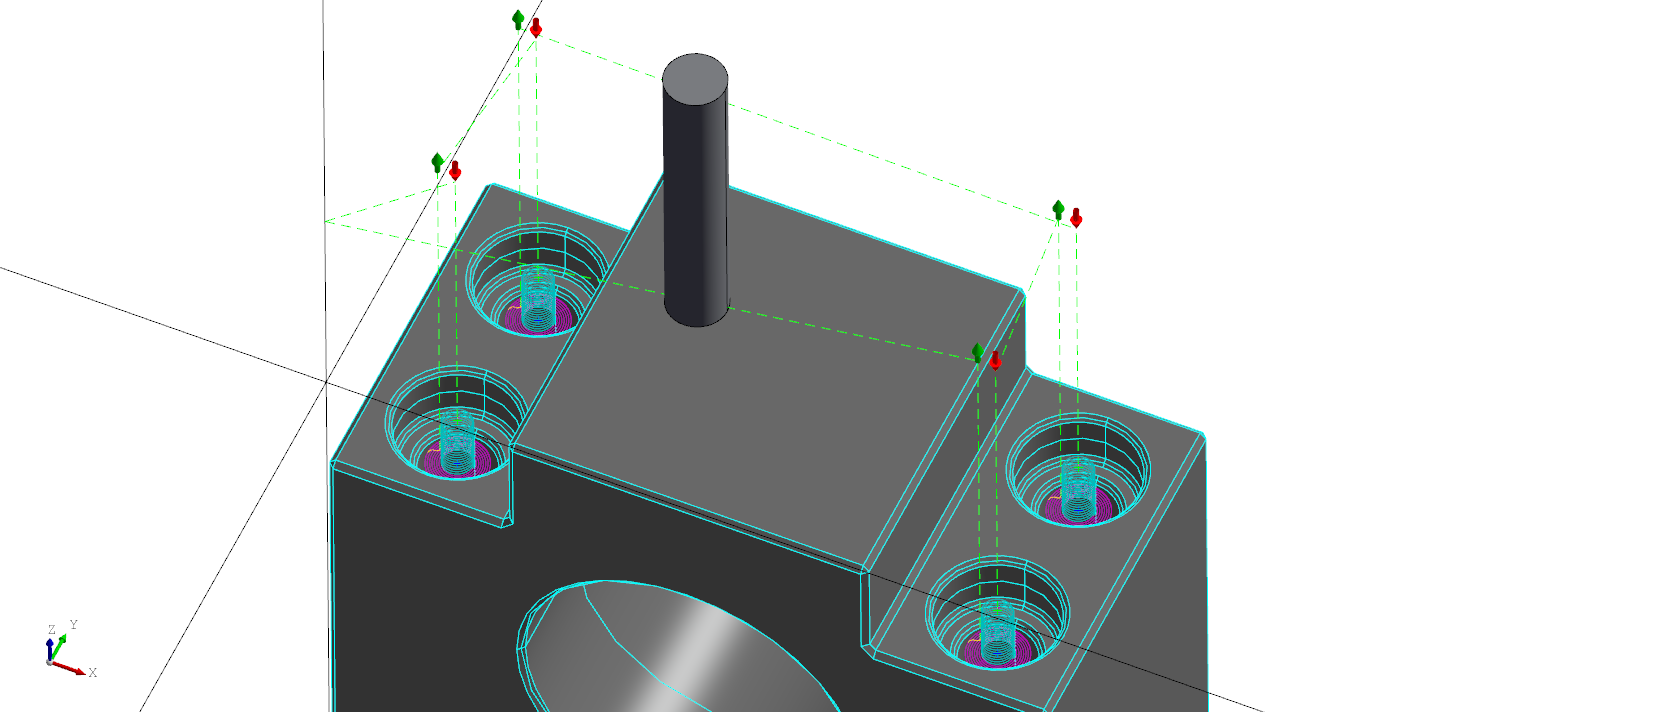
Multiple pockets can be cut in a single operation block. DeclaraCAD will make a reasonable attempt to find the shortest path between all the operations.
Pocket milling
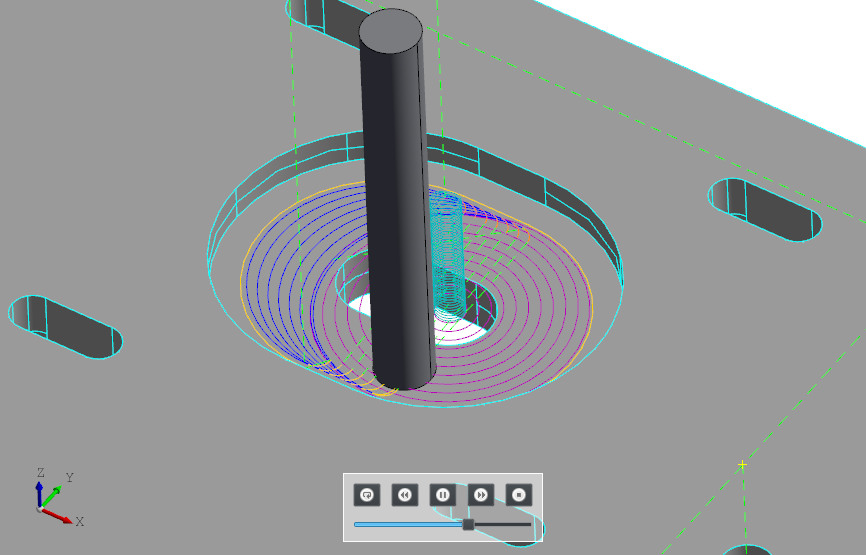
The PocketOperation is used to mill a 2D pocket using adaptive clearing. Provide the tool (an EndMill) and specify the list of faces or wires to pocket as the pockets attribute. The part must also be provided to determine the proper depth. The step_over defines the amount that will be cleared with each trochoid and the amount left for the final outline. The trim attribute can be set to skip milling to corners for fully circular slots.
Like the circular pocket the bottom_clearance, radial_clearance and top_clearance can be specified to allow room for finishing passes. The circular pocket parameters for helix_radius, helix_pitch also apply and the plunge_spindle_speed and plunge_fedrate can be modified as needed (defaults to 75% and 25% respectively).
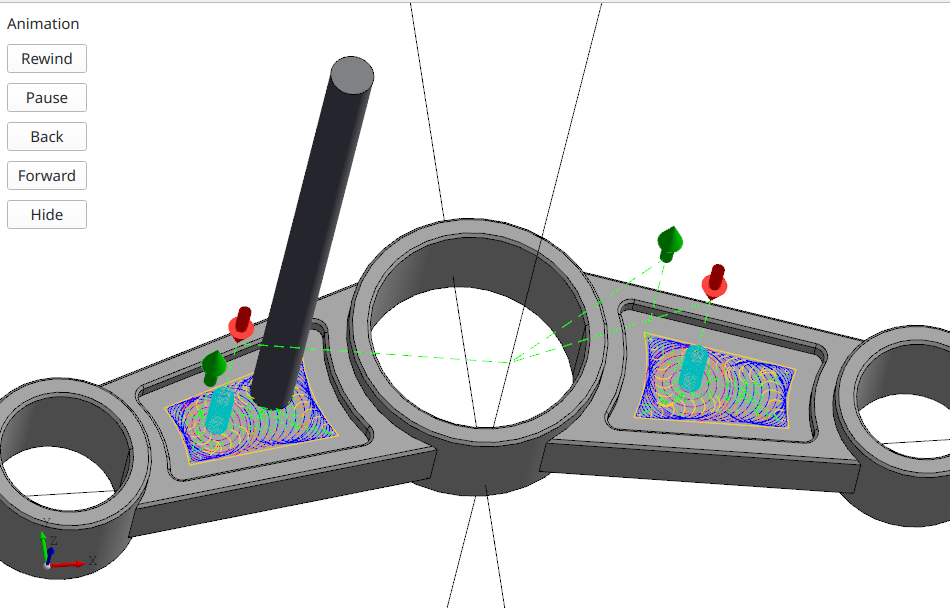
Note: This operation is still under development and may need tweaking.
You can pass a wire instead of a face to ignore any internal holes in the faces.
Facing operation
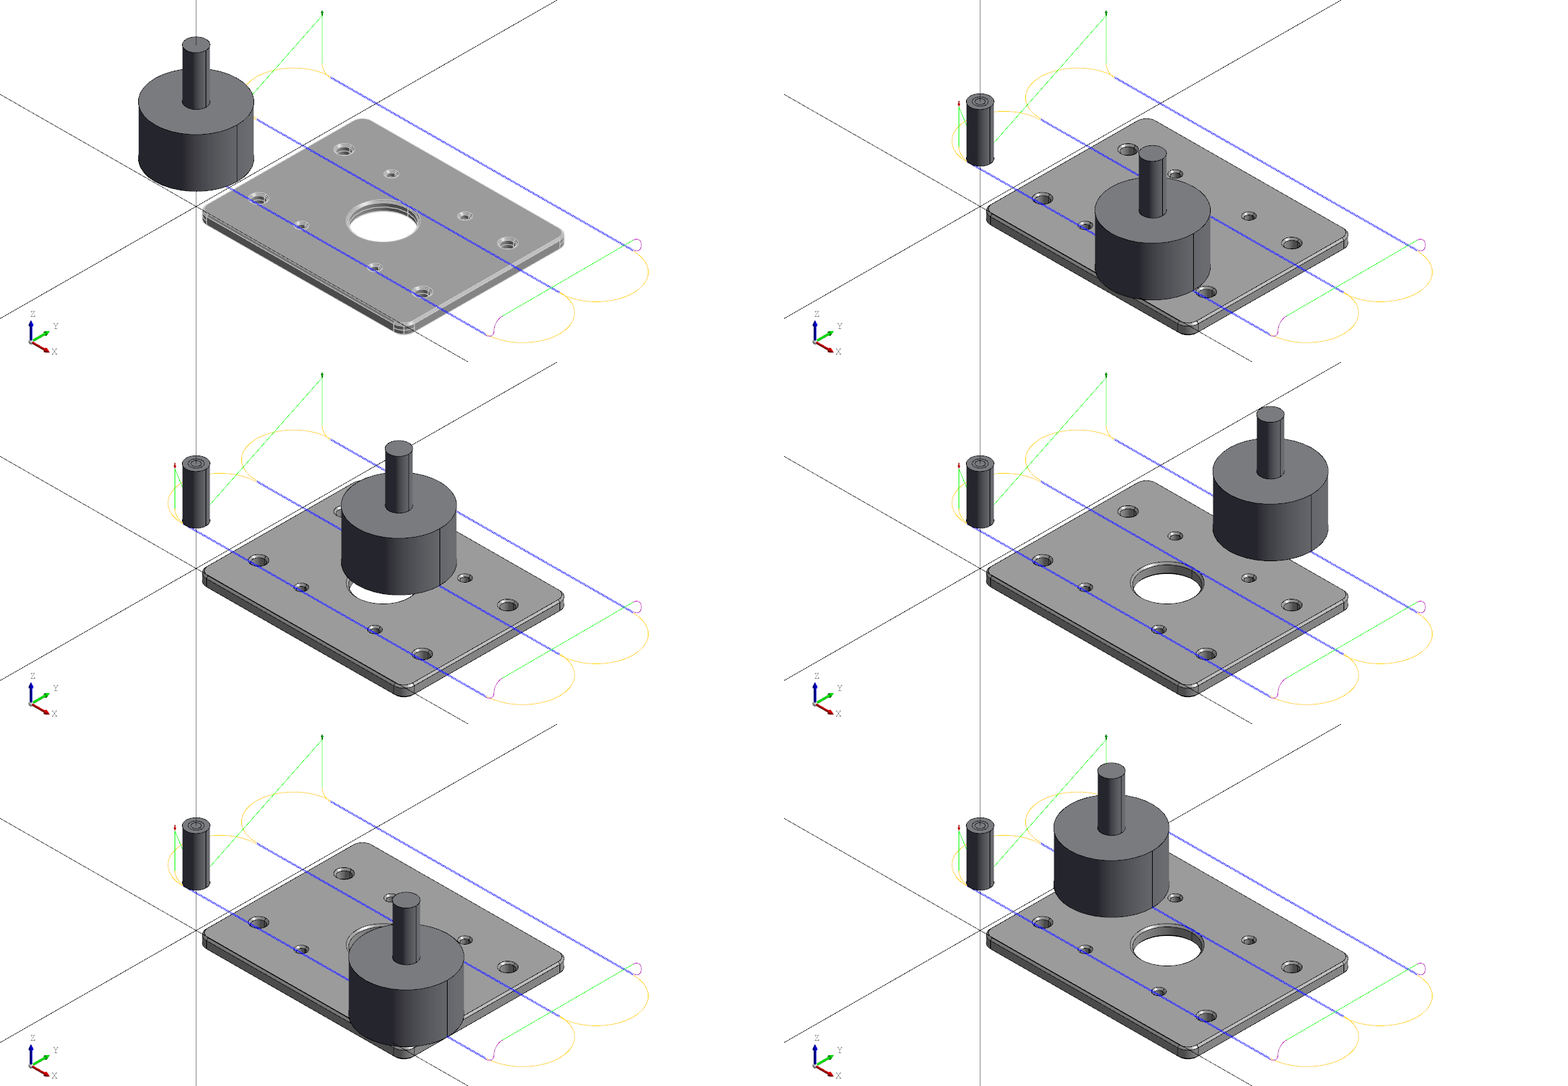
The FacingOperation can be added to a job to create a "zig-zag" toolpath for facing. To use it, provide the tool (typically a FaceMill or EndMill) and specify the tool diameter and the face to clear. The operation creates a zig zag path joined by arcs. Multiple layers will be done if the depth is greater than the step_down. The step_over and step_past can be also be specified, they default to 90% tool diameter and 60% tool diameter respectively. The top_clearance can be used to adjust the entire toolpath up or down to leave more or less material or adjust for the z-zero value set on your machine.
Note: It currently does not handle avoidance regions (coming eventually).
Chamfer operation
The ChamferOperation is used to cut chamfers on holes and contours. To use it, pass in the tool (a ChamferMill), specify the tool diameter and tip angle. Next select the edges to chamfer from the part. Currently each item in the edges list is expected to be a chamfered face. The bit_offset can be used to adjust how much of an offset the bit is shifted from the chamfer plane in order to cut with a stronger part of the tool (instead of the tip).

Note: The above image shows conventional milling (on the holes). There is an option to use climb milling (
climb=True) which is enabled by default.
Contour operation
The ContourOperation allows you to define your own paths in code and will generate G-code for the movement. Simply pass it a list of wires to follow and the tool to generate code for. It will do a vertical drop and lift to the height of the start point between each wire. It does not perform any arc-in or arc-out movements.
Note: It currently does not work with B-Spline or Beziers.
Side cut operation
For lack of a better name the SideCutOperation will do an outside in climb mill cut of faces surrounding an internal avoidance region. To use it pass in an EndMill (or a bull nose if you want an internal fillet) and specify the shape to avoid with the avoid name and the list of faces to cut up to the avoidance region. It is intended for cutting faces with open on multiple sides.
Slot milling
The SlottingOperation is used to mill a slot. If the tool diameter equals the slot width it will do a straight cut, otherwise it will create trochoidal loops. Set the faces to cut and the tool to cut the slot with.
The step_over defaults to 10% of the tool diameter. The radial_clearance and bottom_clearance can be used to leave or remove material from the walls and bottom respectively. If the slot is open on one or both ends the extend_start and extend_end distances can be specified to tell it how far to cut past.
